


Setting up a new TV device doesn't have to be complicated.
If you're using a vSeeBox for the first time, you only need to complete a few basic steps before you can start exploring.
In this guide, we'll walk you through the setup from start to finish — from connecting your vSeeBox to your TV to getting it connected to the internet.
Just follow each step one at a time, and you'll be ready to go.
Before You Start
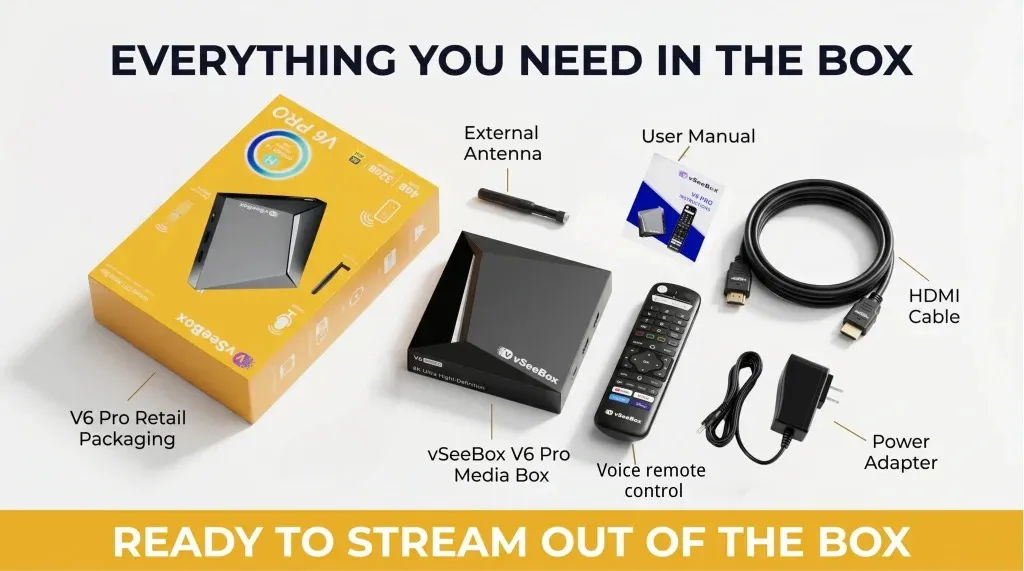
Before setting up your vSeeBox, make sure you have:
-
Your vSeeBox
-
The included remote control
-
HDMI cable
-
Power adapter
-
A TV with an available HDMI port
-
A Wi-Fi connection or Ethernet connection
Tip: If you're using Wi-Fi, keep your Wi-Fi password nearby. You'll need it during setup.
Step 1: Connect the Power
Start by connecting the included power adapter to your vSeeBox.
Then plug the power adapter into a power outlet.
Make sure the connection is secure before moving on.
Step 2: Connect vSeeBox to TV
Take the included HDMI cable.
Connect one end to the HDMI port on your vSeeBox and the other end to an available HDMI port on your TV.
Remember which HDMI port you use.
For example, if you connect your vSeeBox to HDMI 1, you'll need to select HDMI 1 on your TV later.
Step 3: Prepare the Remote
Insert the batteries into your vSeeBox remote.
The battery type may vary by model, so use the batteries included with your device or follow the instructions provided with your specific model.
For Bluetooth-enabled remotes, the remote may need to be paired with the vSeeBox during the initial setup.
Step 4: Turn On Your TV and Select the Right HDMI Input
Turn on your TV.
Using your TV remote, select the HDMI input where you connected the vSeeBox.
For example:
vSeeBox connected to HDMI 1 → Select HDMI 1 on your TV.
Once the correct input is selected, you should see the vSeeBox startup screen.
Step 5: Pair Your Remote
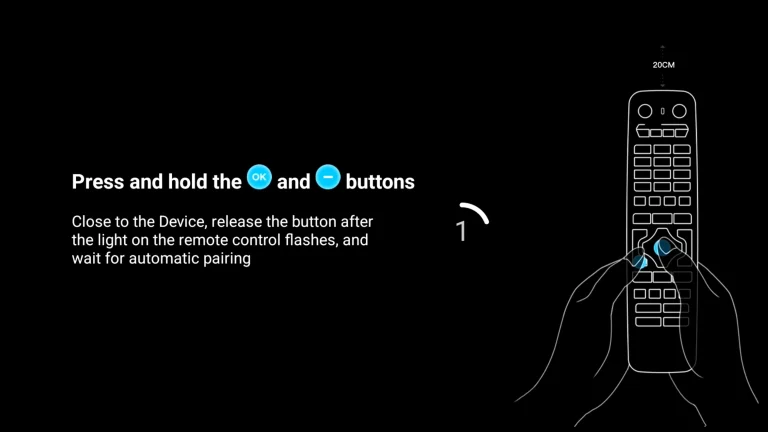
Depending on your vSeeBox model, the first-time setup may ask you to pair the Bluetooth remote.
For models that use the Bluetooth pairing process, follow the instructions shown on your TV screen.
For example, the current V6 Pro and V6 Max setup tutorial instructs users to press and hold the OK and – buttons together until the remote connects successfully.
Once the remote is connected, the setup will move to the next step.
Step 6: Choose Your Language
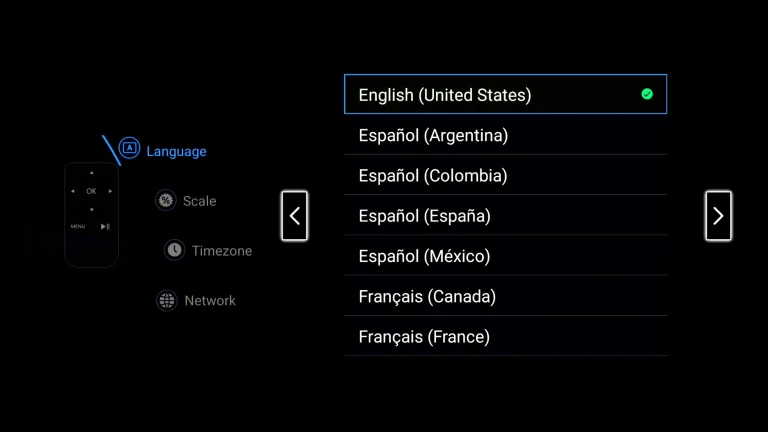
Next, you'll be asked to select your preferred language.
Use the remote to move through the available options and choose the language you want to use.
Then continue to the next step.
Step 7: Adjust Your Screen
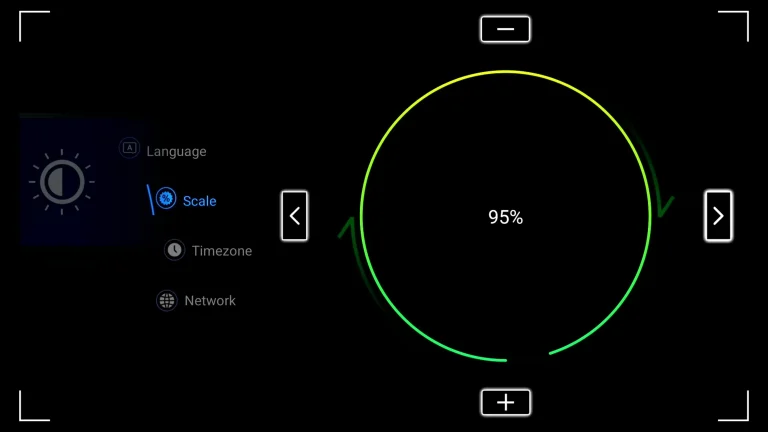
Your vSeeBox may ask you to adjust the display or screen size.
Follow the instructions on your TV and adjust the screen until the image fits comfortably within the edges of your TV.
When everything looks right, continue to the next step.
Step 8: Connect to the Internet
Now it's time to connect your vSeeBox to the internet.
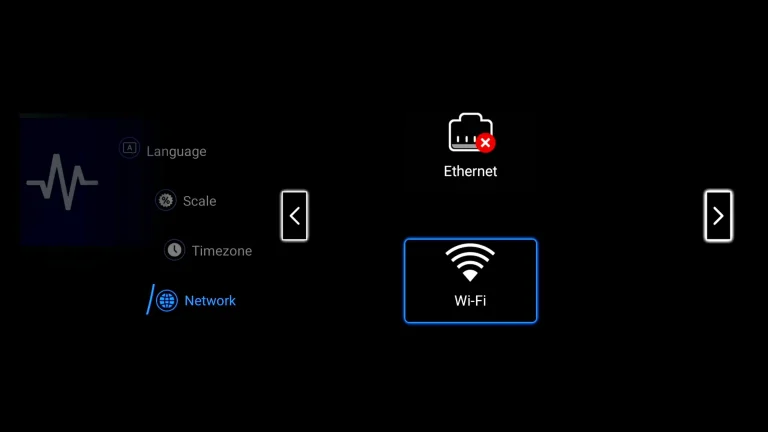
You can use Wi-Fi or, on supported models, an Ethernet connection.
Using Wi-Fi
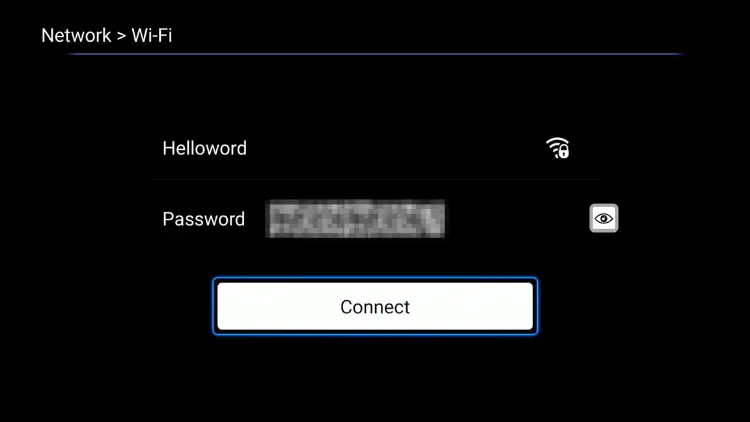
Select your home Wi-Fi network.
Enter your Wi-Fi password and wait for the connection to complete.
Once the device shows that it is connected, continue to the next step.
Using Ethernet
If you prefer a wired connection, connect an Ethernet cable from your router to the Ethernet port on your vSeeBox, if available on your model.
Once the connection is detected, continue with the setup.
Step 9: Complete the Initial Setup
Once your internet connection is ready, continue following the instructions on your TV.
Depending on your model and software version, you may be asked to review settings, accept the applicable agreement, or complete other basic setup options.
You don't need to change everything right away.
For your first setup, simply follow the instructions on the screen and complete the required steps.
Step 10: Explore Your vSeeBox
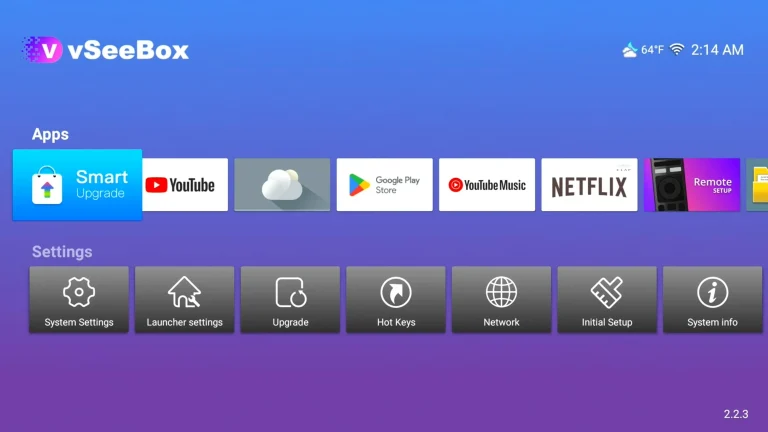
You're ready to start exploring.
Use the vSeeBox remote to move through the home screen and open the apps and features available on your device.
Depending on your model, software, region and app availability, you may be able to access compatible apps and services for entertainment, videos, music and more.
You don't need to learn everything at once.
Start with the features you use most, and explore more when you're comfortable.

Your vSeeBox Is Ready
That's it.
Setting up a vSeeBox is mainly about connecting a few things and following the instructions on your screen.
Connect the power.
Connect the HDMI cable.
Connect to the internet.
Follow the setup instructions.
Then start exploring.
You don't have to be a technology expert to get started.
Take your time, follow each step, and you'll soon become familiar with your vSeeBox.
Ready to Get Started?
If you haven't chosen your vSeeBox yet, explore our available models and compare their features to find the one that fits your home entertainment setup.
Special Offer
Use code [ vseebox28 ] at checkout to save $35 on your order.